|
|
Post by CSP Kris on Dec 1, 2006 13:00:56 GMT
I guess it's pretty obvious (seeing that I have lots of maps, dungeon tiles, etc. on my website), that I like to use miniatures in my games for most combat situations. But sometimes painting up a bunch of figures can be a bit of a chore... and to be honest, most people who paint/collect miniatures generally have more figures than they could possibly paint  Anyway, I recently came across an article on the internet about the 'dipping technique' ...which basically involves painting your miniatures with their base colours (no highlighting or shading) and then simply 'dipping' them into a tin of woodstain and then leaving them to dry (the idea being that the stain sits in the recesses of the miniature in a similar way to a wash). Admittedly it sounds a bit crude... but I thought I would give it a try (and finally get some paint onto a few figures that have been lying around for a while). Anyway... here are the pic's of my most recent attempts... |
|
|
|
Post by CSP Kris on Dec 1, 2006 13:02:07 GMT
First of all you need to clean up the miniature (removing bits of 'flash' or mould lines) and then prime it white. I have used a brush-on primer... and white is recommended as it will make your base coat a little brighter than a black undercoat (as the stain will darken the whole miniature when it is dipped). Then simply paint the miniature with a simple colour scheme (just the basic colours... it is not meant to look pretty at this stage... it just needs the basic colours in the right places). Here's two orcs from Games Workshop's Lord of the Rings line:  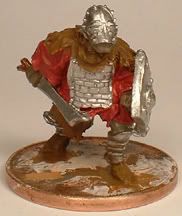 As a rough guide it took about 35 minutes to get the base coat on the second miniature. Also it's pays to remember that the woodstain will basically be shading everything with a dark brown colour - so I have used colours suited to this. Next comes the dip... |
|
|
|
Post by CSP Kris on Dec 1, 2006 13:05:24 GMT
When the miniatures are dry simply take them in your hand (you may want to wear a pair of rubber gloves for this) and dip them head first into a tin of woodstain. The stuff I have been using is water-based and cost less than £3 from my local 'Wilkinson's' store (and I chose the satin walnut colour): 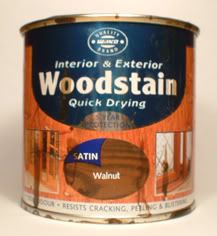 Leave them submerged for a couple of seconds, then pull them out and shake (vigorously) the excess woodstain from the miniature (in an empty cardboard box preferably ). At this stage (depending of the consistency of the woodstain you are using) you may be holding a vague miniature shaped 'blob' in your hand ...if so, take an old brush and gently dab away the excess woodstain that is gathering heavily in the recesses of the miniature. It may also help to take a piece of tissue paper and poke it into some of these areas thus allowing it to soak up some of the excess woodstain. All in all, the whole dipping and soaking up excess woodstain should take around 5 mins. Then place the figures to one side and wait for the woodstain to dry. |
|
|
|
Post by CSP Kris on Dec 1, 2006 13:09:35 GMT
Once they are dry all that is left to do is paint the base of the miniature and sprinkle some static grass or sand upon it. You could of course take some time giving the miniature a spectacular base... but for the sake of speed I've just brushed on some glue and sprinkled it with some brown flock. 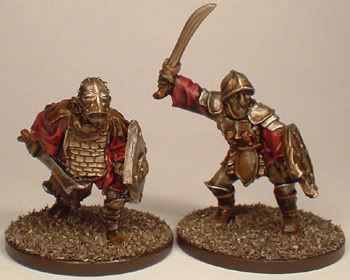 And there you have it. In all truth these figures don't look great under close inspection - and they certainly are not going to win any competitions... but if you need a bunch of miniatures painted up for your next game, and needed them done quickly... then it seems the dipping technique is a viable option |
|
|
|
Post by CSP Kris on Dec 18, 2006 17:20:34 GMT
I have also been doing some tests with a lighter shade of woodstain and here is the result: A Ral Partha ogre (that I'll be using as a LotR-style half-troll): 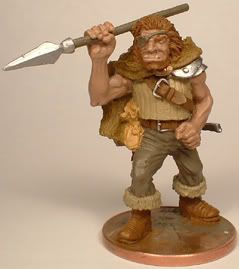 Dipped into this woodstain: 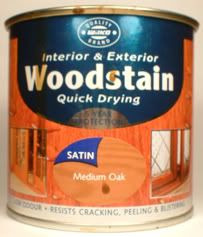 And the final result (with the base tidied up): 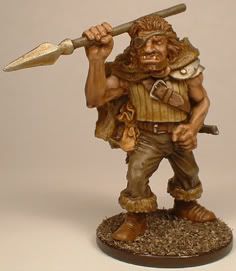 |
|
|
|
Post by ChrisB on Sept 22, 2010 5:50:08 GMT
At what consistency do you use the wood stain? I have 2 tins of wilko's wood stain, Walnut as you had in the first attempt and Antique Pine incase the first is too dark (I am doing High Elves  ) Do I use it straight out of the tin or water it down first? Thanks for your time Chris |
|
|
|
Post by CSP Kris on Sept 22, 2010 10:06:45 GMT
Hello The first miniatures pictured above were definitely just dipped straight into the tin of woodstain as described. I may have kinda 'blobbed' the woodstain on the ogre mini with an old paintbrush (rather than actually dipping it - as this was less messy and less wasteful), but once again I used the woodstain straight out the tin and then shook off the excess. Here are a couple more before and after shots... 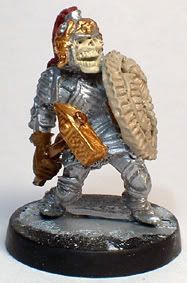 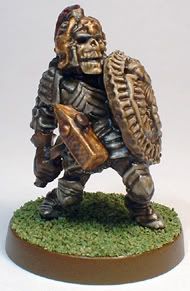 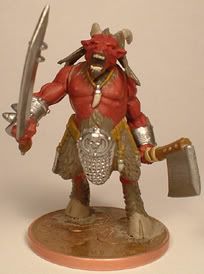  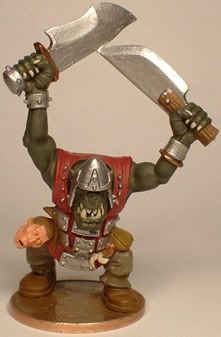 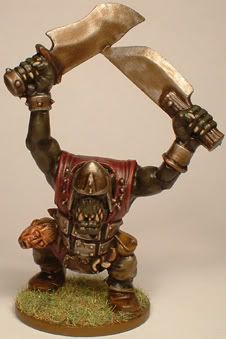 However, you will note that it gathers in an unsightly fashion on large flat areas (see the orc's blades) - so you might need to go back and clean up areas such as that (though the stain can leave the area a little bumpy). I also experimented with watering the woodstain down (as the stain in question is itself water-based) - and that is what I did when I dipped the imperial guard army here: 101st4th.blogspot.comWith the exact procedure noted here: 101st4th.blogspot.com/2008/02/dipping-process.htmlAnd another close-up here: 101st4th.blogspot.com/2008/09/couple-of-days-ago-i-mentioned-fact.htmlIt's also worth noting that it generally works best with browns/reds/flesh type colours ...so if you were going for a pale blue or something like that then I doubt it would work very well. Anyway, if you go ahead with 'the dip' it would be cool to see pic's of how you get on (if possible). |
|
|
|
Post by Chris B on Sept 22, 2010 17:05:21 GMT
For a method described as crude your mini's look great  i might have to reconsider the white on my core infantry on , my helves though lol thanks for the reply and i will try to get some pics up on completion of my spearmen |
|


 )
) i might have to reconsider the white on my core infantry on , my helves though lol